December 22, 2009


I'm spending my holidays back in England's Lake District, where snow is falling, snow on snow, and my days are spent walking in the hills or reading by the fire. I'm a pampered guest, so I'm not really cooking, but I'm feasting on things like Grasmere gingerbread and Cartmel sticky toffee pudding.

Thank you so much for reading O Pistachio this year (I can't believe it's nearly time for the one year anniversary!). And while I think of it, my very first post, early in 2009, was these lovely bread wreaths: they were perfect on our Christmas table.

I hope your holidays are full of peace, joy, and delicious baked goods.

Here are some photos of all the loveliness I'm enjoying.


December 17, 2009

cream cheese frosting


Frosting is a foreign term to me - usually I'd say icing. But when it has cream cheese in it, I feel like it just has to be called frosting. I made this to go with gingerbread cupcakes, but I can imagine it just as happily on carrot cake, or chocolate cake, or basically any other kind of cake. Those cupcakes are delicious enough not to be a mere vehicle for frosting, but you'd want to make sure whatever you paired this stuff with could stand up to its impact. Otherwise you may just find yourself eating it with a spoon (not that there's a damn thing wrong with that).

And the nice thing is that it's the Joy of Cooking recipe. I tried it because of Slashfood, which calls it "the last cream cheese frosting recipe you'll ever need".

Cream Cheese Frosting
From The Joy of Cooking

8 oz cold cream cheese*
5 tbsp softened butter
2 tsp vanilla
2 cups powdered (confectioner's/icing) sugar, sifted after measuring, plus extra to taste

Beat cream cheese, butter and vanilla together with an electric mixer until smooth and combined. Gradually add 2 cups powdered (icing) sugar, and then add more sifted powdered (icing) sugar until it reaches a sweetness you like.

* Cold cream cheese really does make a difference, but it shouldn't be super-hard - just straight out of the fridge.

gingerbread cupcakes with cream cheese frosting


Please make these: they're amazingly good. They're warm with ginger and spice, soft, and they're great as tiny little cakes, which is how I made them. The cream cheese frosting is so phenomenal that I'm going to give it its own post, just so I can find it easily in the future. I took them to a party and let people ice their own cakes; the kids liked them plain, the grown-ups were all over the frosting. One of my friends took the leftover frosting home and "ate it like a pudding".

The original Martha Stewart recipe uses unsulphured molasses, which I don't love; I substituted golden syrup
, which still gives a fantastically gingerbready flavour. I know golden syrup is less common in the US, but I've found it for sale in both the groceries stores near me in Austin
.


Gingerbread Cupcakes
adapted from Martha Stewart

2 tsp baking soda (bicarbonate of soda)
2 1/2 cups all purpose (plain) flour
2 tsp ground ginger
1 1/2 tsp ground cinnamon
1/2 tsp ground cloves
1/2 tsp ground nutmeg
1/2 tsp salt
2 tsp baking powder
8 tbsp (1 stick) unsalted butter, room temperature
2/3 cup packed dark brown sugar
1 cup golden syrup
2 large eggs, room temperature, lightly beaten

Heat oven to 350°F / 175°C. Line muffin tins (mini or otherwise) with paper baking cups, and set aside. In a small saucepan, bring 1 cup water to a boil. In a bowl, combine boiling water and baking soda; set aside. In a large bowl, sift together flour, ground spices, salt, and baking powder; set aside.


In an electric mixer fitted with the paddle attachment, cream the butter until light. Beat in the brown sugar until fluffy, 1 to 2 minutes. Beat in the golden syrup, baking-soda mixture, and flour mixture. Beat in the eggs.


Fill the cupcake papers three-quarters full. Bake cupcakes until a toothpick inserted in the center of them comes out clean, about 25 minutes for ordinarily-sized cupcakes, or 15-20 minutes for mini cupcakes. Let cupcakes cool a few minutes, then transfer to a wire rack to cool completely before decorating.


December 11, 2009

maple pot de creme


Maple syrup is one of those flavours that is miraculous with everything. Truly - everything. I'm grateful to America for a lot of things (some of my dearest friends, for example), but maple syrup with bacon is very high on the list. I'd never combined these two delicious things until I moved to the US. You might say my life hadn't really begun, and if you were to say that, I might protest only slightly. Part of me would know that was true.

I'd also never eaten pot de cr
ème until my Oregonian friend Michael forced me to (when I say forced, I mean that he very kindly made coffee pot de crème for dessert one frigid New England night, for which I am still grateful). Michael is a poet and a chef, two excellent things to combine (much like maple syrup and bacon).
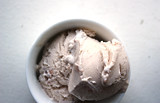
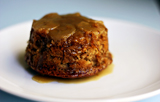
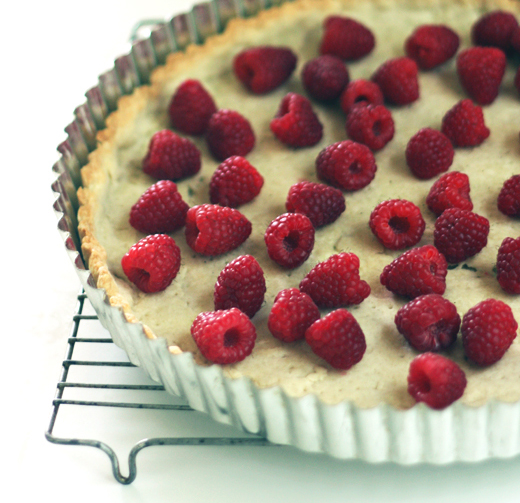
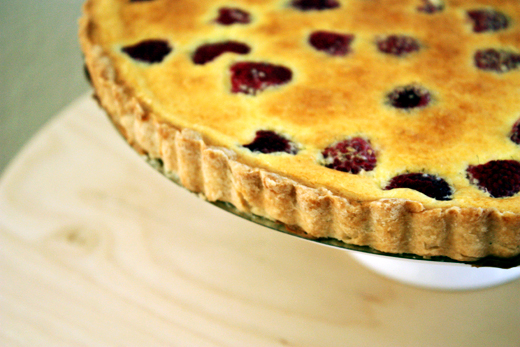
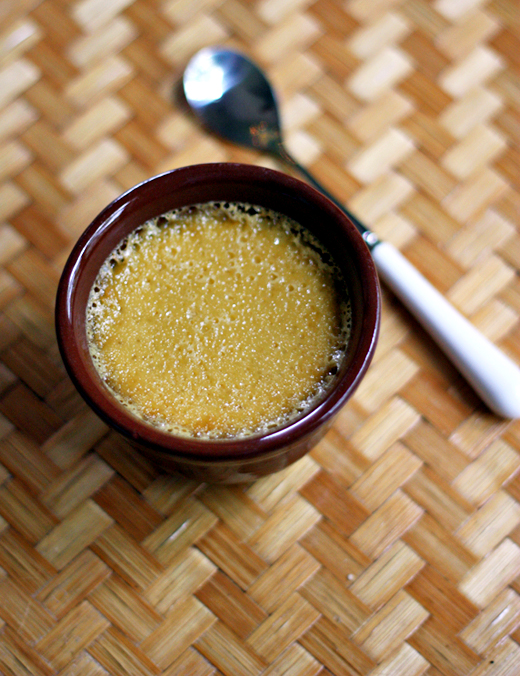
Pot de cr
ème is really just chilled and flavoured custard. It's full of good, nutritious things, like eggs and cream and milk, and then flavoured with something - often with vanilla, which is probably its most chic incarnation. Because it's the season for it, I chose maple syrup. I served mine with lightly toasted walnuts and blackberries.

I wish I had a photo of how smooth and silky the custard was under that honey-coloured layer. I meant to keep one aside, not only to photograph the next day, but to enjoy. But we ate it. I knew it was wrong, but I was powerless to prevent us.
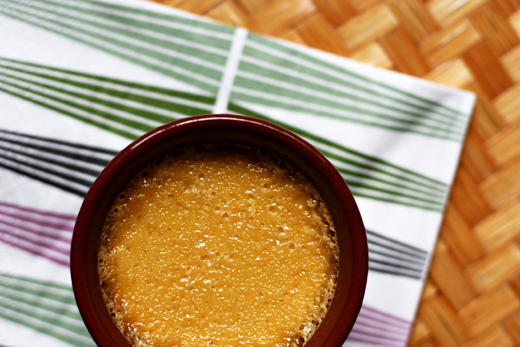


Maple Pots de Creme
recipe from Eggs on Sunday

1 1/2 cups heavy cream

1/2 cup maple syrup (Grade B/Dark Amber for best flavour)

1/4 teaspoon salt

4 egg yolks

1/2 teaspoon vanilla

Preheat the oven to 300°F / 150°C. Place four 3/4-cup ramekins in a metal baking pan and set aside.

In a medium saucepan, bring the cream, maple syrup, and salt to a simmer over medium high heat. While the cream mixture is heating, whisk together the egg yolks and vanilla in a large bowl.

Once the cream comes to a simmer, temper the egg yolks by slowly adding the hot cream mixture, little by little, into the egg yolk mixture and whisking constantly. Once all the cream mixture has been incorporated, strain it through a fine-mesh sieve either back into the pot that you heated the cream in, or into a glass liquid measuring cup.

Divide the mixture among the four ramekins. You’ll bake them in a hot water bath, so pour enough very hot tap water into the baking dish so that it comes halfway up the sides of the ramekins.

Bake in the oven for about 50-60 minutes, or until the pots de creme are set around the edges but still slightly jiggly in the middle. Once they reach this point, remove them from the oven and take the ramekins out of the hot water bath. Let them cool at room temperature (they will continue to set as they do so.)

Makes 4.

December 8, 2009

apple strudel muffins


I made these as a bribe: I had to give a presentation in class (on this extraordinary object, which in other circumstances - for example, at a party, with bourbon - I'd be happy to talk about at length), it was far too early in the morning, and I thought it was best to distract my audience with muffins. Now I think they may be the perfect decoy in all kinds of situations. They're a little spicy from the cinnamon and nutmeg, not too sweet, soft with apple, and covered with a crunchy strudel topping.


Aren't these baking cups lovely? I bought them in Singapore, at a wondrous store where everything was Japanese and cost $2. I think about that store much more often than is strictly necessary.


Apple Strudel Muffins
adapted from Allrecipes

2 cups plain (all purpose) flour
1 tsp baking powder
1/2 tsp baking soda (bicarbonate of soda)
1/2 tsp salt
1/2 cup unsalted butter, room temperature
1/2 cup white sugar
1/2 cup light brown sugar
2 eggs
1 1/4 tsp vanilla extract
1 tsp ground cinnamon
1/2 tsp ground nutmeg
1 1/2 cups finely diced apples

For the topping*:
1/3 cup packed brown sugar
1 tbsp plain (all purpose) flour
1/8 tsp ground cinnamon
1 tbsp butter

Preheat oven to 375°F / 190°C. Grease a 12 cup muffin pan or a 24 cup mini muffin pan, or fill with muffin/cupcake cases.

In a medium bowl, mix flour, baking powder, baking soda, salt, nutmeg and cinnamon.

In a large bowl, beat together butter and sugar until smooth. Add eggs. Mix in vanilla. Stir in apples, and gradually blend in the flour mixture. Spoon the mixture into the prepared muffin pan.

To make the topping, mix brown sugar, flour and cinnamon in a small bowl. Melt the butter and stir it through the sugar mixture until it forms coarse crumbs. Sprinkle over tops of muffin mix.

Bake 20 minutes in a preheated oven, or 15 minutes for mini muffins, or until a toothpick inserted in the centre of a muffin comes out clean. Allow to sit for 5 minutes before removing muffins from the pan. Cool on a wire rack.

* Some of the reviews on allrecipes suggest making double the topping mixture. Then, you fill the muffin pans halfway with the muffin mixture, add half the topping, top up the muffin pans with muffin mixture, and then add the rest of the topping. I think this sounds fabulous, but I didn't try it because I was making mini muffins.

November 22, 2009

chocolate pecan galette


I get to have two Thanksgivings this year, which I think is impressive for someone who isn't even American. First up was Friends Thanksgiving, imported from Montana by dear friends with the motto "all the food and none of the family". It was one enormous, delicious, Thanksgiving-themed pot luck, and dessert was partly my responsibility. Both of my contributions were Australian - a pavlova, which I know is only controversially Australian and which I completely failed to photograph before it vanished, and this chocolate pecan galette, which seems more Franco-American than anything else, but which came from the website I'm going to more than any other for recipes at the moment: Australian Gourmet Traveller.


It doesn't look quite like the pecan pie you'd expect on the Thanksgiving dessert table; more like something in a Parisian patisserie. I wish I had better photos of the finished product, but I'm planning to make it again for real Thanksgiving, so maybe I'll update with something prettier. It's simple to make, too - just store-bought puff pastry (all butter, preferably) encasing a filling of ground pecans and semisweet chocolate. Rich and gorgeous.


Chocolate & Pecan Pie
adapted from Australian Gourmet Traveller

Serves 10

250g pecans
185g dark chocolate (at least 61% cocoa solids), coarsely chopped
25g (1/4 cup) Dutch-process cocoa
200g raw caster sugar (or raw sugar)
100g unsalted butter, softened
5 egg yolks
1/2 tsp sea salt
2 butter puff pastry sheets (375g each)
1 egg, lightly whisked with a splash of water, for egg wash

Process pecans in food processor or blender until finely ground and transfer to a bowl. Process chocolate in food processor or blender until finely ground and add to pecans. Add cocoa, sugar and butter and, using your hands, work butter into dry ingredients until well combined. Add yolks and 1/2 tsp sea salt and mix to combine. Cover with plastic wrap and refrigerate until chilled (at least 1 hour, or overnight).

Line an oven sheet with baking paper. Place one sheet of pastry on the baking paper. Shape the chocolate mixture into a disc, then place it in the middle of the pastry. Use your hands to shape mixture into a 22cm / 9in diameter dome. Brush pastry edges with egg wash, then cover with the remaining pastry sheet. Trim pastry to a 25cm / 10in circle, folding edges and pressing to seal. Refrigerate until chilled, about 30 minutes.

Preheat oven to 220°C / 425°F. Pierce a small hole in the pastry top for steam to escape, then use a sharp knife to score a pinwheel pattern on top of the galette. Brush with remaining eggwash. Bake until golden and puffed, 20-25 minutes. Cool on a tray for 20 minutes, then serve with double cream or vanilla ice cream.

November 14, 2009

banana maple upside-down puddings


November in Texas, it turns out, makes up for August in Texas. It's warm and sunny every day, as opposed to infernal and sunny every day. Trees are still green; birds are arriving from the north; I'm not even close to thinking about coats and scarves. All of this is wonderful, and I love it, but it means I have no business making autumnal, comforting things like these banana-maple upside-down puddings. But it's just that this time last year I was in chilly New Hampshire, walking in the turning woods and buying maple syrup from the farmer's market and roasting things and drinking tea, and I sort of miss it.

So here are some autumnal/fallish puddings for you, sweet with caramelised maple syrup but ever so slightly summery with bananas. Maple syrup and bananas are so extraordinarily tasty together, but then, maple syrup is extraordinarily tasty with everything.


Banana Maple Upside-Down Puddings
adapted from Australian Gourmet Traveller

Serves 6

200 ml maple syrup
160g soft butter
80ml (1/3 cup) pouring cream (heavy cream)
3 ripe bananas, peeled
1 tsp lemon juice
220g (1 cup) raw caster sugar (or just raw sugar)
2 eggs
1/2 tsp vanilla extract
250g plain flour
1 tsp bi-carbonate of soda (baking soda)
1 tsp ground cinnamon
80ml (1/3 cup) milk

Cook maple syrup in a saucepan over medium-high heat for 3-4 minutes or until starting to caramelise, add 35g butter and all the cream and swirl to combine. Pour 2 tbsp of maple-caramel into bases of six 1-cup capacity metal darioles, swirling to coat sides slightly and reserving remaining caramel mixture. Thinly slice 1 banana widthways, layer slices over caramel and set aside.

Preheat oven to 160°C / 320°F. Using a fork, coarsely mash remaining bananas with lemon juice, to yield 3/4 cup, and set aside. Using an electric mixer, beat remaining butter and sugar until pale and creamy. Add eggs, mashed banana and vanilla extract and beat to combine. Sieve over flour, bi-carbonate of soda and cinnamon, stir to combine, add milk and mix until smooth.

Divide pudding mixture into moulds to 1.5cm below rims (there may be a little mixture left over), smoothing tops, and bake for 20-25 minutes or until risen and firm to the touch. Unmould immediately onto serving plates, drizzle over reserved maple-caramel and serve with double cream or ice cream.

November 9, 2009

vanilla & raspberry cheesecake tart


Three months since posting! The time has flown, which I guess it has a habit of doing when you move to another city and start graduate school. At first I had no time to cook; now I have time to cook but no time to post; soon, I hope, everything's going to settle down and I'll have time for everything (also, I should point out, there's a lot more to do - and eat - in Austin than there was in small town New Hampshire).

So, to apologise for my absence, I'm giving you this delicious object: Tamasin Day-Lewis's raspberry and vanilla cheesecake tart. It isn't a cheescake, except that it is; it's a cheesetart, which is a grown-up kind of cheesecake: crumbless, slender, elegant, and very, very good to eat.


Raspberry & Vanilla Cheesecake Tart
adapted from Tamasin's Kitchen Classics, by Tamasin Day-Lewis

For the shortcrust pastry:

170g / 6oz plain white flour
pinch of sea salt
85g / 3oz unsalted butter, cold, chopped into small pieces
1-2 tbsp ice cold water
2 tbsp sugar

For the filling:

140g / 5oz cream cheese, room temperature
150ml / 5 fl oz double (heavy) cream
1 heaped tbsp unflavoured Greek yoghurt
3 small eggs and 2 egg yolks
1/2 vanilla pod, the seeds scooped out from the split pods with a teaspoon
340g / 12 oz raspberries

Sift the flour into a large bowl with the salt and sugar, add the chopped butter, and work as briskly as you can to rub the fat into the flour. Use the tips of your fingers only, or a pastry cutter. Add the water bit by bit until the mixture coheres into a ball - you may not need to use all the water, and remember that the more you use, the more the pastry will shrink when you bake it blind. Form the pastry into a disc, wrap it in plastic, and chill it in the fridge for about 30 minutes.

Flour your work surface, your hands and a rolling pin. Roll the pastry out to fit a 20cm / 8in tart tin. Grease the tart tin, then lift the pastry with the rolling pin and place it in the tin. Don't stretch it, or it will shrink back. Chill for at least 30 minutes.

Preheat the oven to 200°C / 400°F / gas 6. Tear off a piece of greaseproof paper a little larger than the tart tin and place it over the pastry. Cover the paper with a layer of dried beans or baking weights. Place in the oven for 15 minutes, then remove the paper and beans and prick the base of the pastry. Return the tart to the oven for 5-10 minutes to dry the pastry base.

Meanwhile, assemble and make the filling. Turn the oven down to 180°C / 350°F / gas 4. Scrape the cream cheese into a bowl and add the cream, yoghurt, eggs and yolks, and vanilla to the bowl. Whisk all together until smooth. Scatter the raspberries over the base of the pastry shell in a single layer, then scrape over the cheesecake mix. Bake for about 45 minutes until golden and set. Cool on a rack.

September 28, 2009


Please excuse my inactivity while I settle in to life in Austin, Texas, and eat delicious fried things out of trailers (see above: fried chicken cones with chili fries, washed down by a peach shake) instead of cooking in my new (tiny but lovely) kitchen. I'll be back soon!

August 1, 2009

bite-size tomato tarts


These tiny tarts are delicious and quick and people get very excited about them, which is the best kind of summer party cooking.

There's no recipe, really: I cut circles from ready-made puff pastry with a 2 inch circular cookie cutter, and then topped them with a mixture of salami, cherry tomatoes, thyme and goat's cheese. Here are the combos I made (and it was nice to have a platter full of slightly different flavours):

* Salami & roast cherry tomato: I cut the salami to the same size as the pastry with the same cookie cutter. I cut the cherry tomatoes in half and roasted them for about half an hour before arranging them on top of the salami with a few thyme leaves.

* Goat's cheese & roast cherry tomato: I mixed some soft goat's cheese with a little salt and pepper and some thyme leaves, and topped with roast cherry tomatoes.

* Sweet cherry tomato: I didn't pre-roast these cherry tomatoes - instead, I cut them across-ways into small, round slices. I put a tiny bit of brown sugar on top of the pastry, then arranged the round slices of tomato in a circle and sprinkled with salt and pepper. I think these were my favourite flavour - the tomatoes stay quite firm and fresh, just beginning to melt, and the sticky sugar gives just the right hit of sweet. You can see one in the lower right hand corner of my last photo.

I baked them all on top of parchment paper in a 400°F / 200°C / Gas Mark 6 oven for about 25 minutes.

July 18, 2009

stir-fried green beans with garlic & chillies


These are the green beans I made to serve alongside the Thai beef with chilli and mint I posted earlier in the week. They take 5 minutes to make and are absurdly delicious: salty with soy, spicy, and almost sweet with garlic. The beans aren't overwhelmed by all these flavours, but stay crisp and distinctly themselves.


Stir-fried Beans with Garlic & Chillies

150g / 5 oz green beans, topped and tailed
peanut (groundnut) oil
2 garlic cloves
2 Thai bird's eye chillies, or other hot red chilli peppers*
1 tbsp soy sauce

Prepare everything before you cook: top and tail the beans; crush the garlic cloves; remove the seeds from the chillies and dice (always wear gloves when working with bird's eye chillies). Have the soy sauce and a measuring spoon ready.

Lightly oil a wok, then place over medium-high heat. When the wok is very hot, add the beans and stir-fry for 2 minutes. Add the chilli, stir-frying very briefly, and then the garlic. You must be very careful not to burn the garlic, so keep stirring the beans as you add it, and wait only a few seconds before adding the soy sauce. Cook for about 10 more seconds, stirring all the while, before removing from the heat and serving immediately.

* If you replace the Thai bird's eye chillies with another kind of hot chilli pepper, you'll need to experiment - you may need more or less than two of them.

July 15, 2009

apple & blueberry shortcake


One of my dearest friends turns 30 today, and so, because I can't be there to celebrate with him, I set out this afternoon to make him an e-cake. Really, if I were making a cake for this friend, knowing he would eat it, it would be something slim and elegant, dark with the darkest of chocolate, a touch of alcohol, maybe the faintest taste of orange. But since he's not here, I ended up with this instead: an apple and blueberry shortcake that's really, let's face it, a pie.

It's Bill Granger's fault that I started out making a cake and ended up with a pie, but it would be ungracious of me to complain, because this cake/pie is so very good. In fact, now that I think further on the issue of the cake/pie, the final effect is something more like an enormous, soft and delicious cookie stuffed with stewed apple and blueberries. I'm certain my friend would approve, and so I offer it to him with love: HAPPY BIRTHDAY!!


I was halfway through making this when I remembered that the springform cake pan I assumed I had ready to use was actually in storage a few thousand miles away. So I made mine a little more free-form, just laying baking paper down on a flat baking sheet and forming the shortcake on top of that. I'm sure using the tin, as Granger's recipe instructs, would result in a slightly more cake-like cake - I'm certain mine spread more than it might have otherwise, resulting in the (I think, rather charming) globular effect on top. (The person I did share this cake with, who is not celebrating a birthday today, referred to these with affection as the cake's "boobs". I was reminded of this statue.)


Apple & Blueberry Shortcake
from Bill's Food, by Bill Granger*

4 large Granny Smith apples
finely grated zest from 1 lemon
2 tbsp sugar
125g (4 1/2 oz) unsalted butter
125g (1/2 cup) caster (superfine) sugar
1 egg
185g (1 1/2 cups) plain (all-purpose) flour
1 tsp baking powder
155g (1 cup) blueberries
demerara or granulated sugar, for sprinkling

Peel and core the apples, then cut into about 16 slices. Put the apples, lemon zest, the 2 tablespoons of sugar, and 2 tablespoons of water into a medium saucepan, then cover and stew over a low heat for about 10 minutes, until the apples are soft but not mushy. Allow to cool.

Cream the butter and caster sugar together in a bowl until fluffy and smooth. Add the egg and mix well. Sift the flour and baking baking powder into the mixture and stir until combined. Turn onto a lightly floured surface and knead until smooth. Divide into two and refrigerate for 30 minutes.

Preheat the oven to 180°C / 350°F / gas 4. Roll each half of cake dough into a circle approximately 22cm (8 1/2 inch) across. Press one circle into a 24cm (9 inch) non-stick springform cake tin. Spread the apples over the dough, leaving a small border around the edge. Sprinkle with blueberries. Place the other round of dough on top and press the edges together. Brush with water and sprinkle with sugar.

Bake for 35 to 40 minutes, then allow to cool in the tin for 20 minutes before removing. Serve with cream or vanilla ice cream. Serves 8 to 10.


* I actually just remembered that this book was a gift from my birthday friend! That was a lovely accident.

July 12, 2009

Thai beef with chilli & mint


This dish, really, is Thai-inspired. I've borrowed many of the flavours from the traditional Thai beef salad, but used lots of mint rather than coriander, and stripped it back to only the beef. You cook the beef briefly in a frypan (and grilling it on a barbecue would be great too) and then toss it in a salty soy dressing with hot chillies and bundles of mint. I served it with steamed rice and spicy stir-fried green beans (recipe coming soon), and we also improvised by wrapping strips of the beef up in cold, crisp iceburg lettuce leaves.


Thai Beef with Chilli & Mint

350g rump steak
5 tbsp soy sauce
2 tbsp fish sauce
juice of 1 lime
pinch of sugar
2 Thai bird's eye chillies*, chopped
handful of fresh mint leaves

Trim the steak of excess fat and place it in a shallow dish with 4 tbsp of the soy sauce. Marinate for at least one hour.

While the steak is marinating, make the sauce. Combine 1 tbsp of the soy sauce with the fish sauce, fresh lime juice, sugar, chopped chillies and mint leaves. Mix well.

Lightly oil a skillet or frying pan and place over a medium-high heat. Once the frying pan is hot, lift the steak out of its marinade and place in the pan. Cook for 3 minutes on each side for medium-rare, or longer to taste. Remove the steak from the pan and place on a plate, leaving it to rest, uncovered, for 5 minutes.

After the steak has rested, use a sharp knife to thinly slice it. Mix the slices with the sauce, and serve immediately.

* I've never had much luck finding these chillies in America, so if they aren't available, use another hot red chilli pepper. You might need more or less than 2, though.

July 7, 2009

strawberries in moscatel with almond shortbread


Moscatel is the name of the Spanish sweet wine made from the muscat grape. Cleopatra drank wine of the muscat grape, and so did the mourners at the funeral of King Midas. And I drank it last night while eating moscatel-soaked strawberries with thick cream and thin almond cookies.

The strawberries recipe is from Sam and Sam Clark's wonderful Moro cookbook. I've recently been reunited with most of my cookbooks, which lived in storage for over 3 years, and this is probably the one I'm most excited to see again. I inherited my bottle of moscatel from the previous residents of the house I'm staying in and was wondering what to do with it when I found this recipe in Moro; between the moscatel and the current glut of British strawberries, it seemed just right.

Moscatel is a sweet wine, aromatic but not cloying. It forms an amber pool around the strawberries, which soften and swell. The Clarks serve their boozy berries with Moorish sandcakes, but I experimented with a simpler almond shortbread. The best thing was to spoon the strawberries onto the shortbread cookies, splodge on some cream, and eat, but I'm sure there are more delicate ways of managing. This makes too many cookies, but they're so tasty you won't mind.


The light situation in this house isn't fantastic; it's old and stone with deep-set windows, so there's no happy medium between bright bright windowsills and too-dark rooms. This is cosy and lovely for living and bad for photographing food, so I'm thinking of these photos as moody and atmospheric and reassuring myself that everyone knows what a bowl of strawberries looks like...


Strawberries in Moscatel
adapted from Sam & Sam Clark, Moro

300g strawberries, washed, drained and stalks removed
140ml Moscatel Málaga wine or Moscatel sherry
1 level tbsp icing/confectioner's sugar

Mix the strawberries with the Moscatel and icing/confectioner's sugar to taste, and marinate in the fridge for a few hours, covered. You can slice your strawberries before or after marinating, or leave them whole. Serve chilled. Serves 2-4, depending on large you want portions to be; if you want to increase the number of strawberries, you won't need much more wine than this.


Almond Cookies*

170g unsalted butter
115g caster sugar (ordinary granulated sugar will also be fine)
140g plain flour
50g ground almonds / almond meal
a pinch of salt
sugar for sprinkling - demerara or ordinary granulated

Place the butter and sugar in a large bowl. Using a hand-held mixer, cream the butter and sugar together until well combined. Sift the flour, ground almonds / almond meal and salt into a separate bowl and mix well, then add to the butter and sugar mixture. Mix together on a low speed until the dough comes together - this won't take long. Don't over-mix. Turn out onto a surface dusted with flour and form a flat disc. Wrap this disc in plastic and refrigerate for 30 minutes.

Preheat the oven to 350°F / 180°C / gas mark 4. Line a baking sheet with baking paper.

Placed the chilled disc on a floured surface and roll out until about half a centimetre thick (you don't need to be too precise, but if the cookies are too thin, they'll spread). Use a cookie cutter to stamp out circles and transfer them onto the baking sheet. You'll probably need to use a metal spatula to transfer them - the dough softens very quickly. Allow the cookies a little room to expand.

Sprinkle the cookies with a little sugar, then bake for 20-25 minutes, or until the edges begin to brown. Cool to room temperature. Makes approx. 24 cookies.


* The metric measurements of this recipe reflect my newest toy, a set of electric scales. I'm sorry not to have included cup measurements for US readers, and promise to try and do so in the future, but I got so carried away by the perfection of measuring to within a gram that I didn't work out the equivalents.

July 1, 2009

Grasmere gingerbread


As you can see, this is no ordinary gingerbread; it's really more like an intensely ginger-flavoured shortbread topped with sandy, sugary, gingery crumbs. It's been made since the 1850s in the tiny Lakeland village of Grasmere, famous as the home of William Wordsworth (and also sometimes Coleridge, and also that dandy junkie, Thomas de Quincey). The shop that sells it - which used to be the village school - is tucked into a corner of the churchyard where Wordsworth sleeps, and surrounded by the delicious fug of baking gingerbread.


It seems drastic to say that this is the best gingerbread I've ever eaten, but it is. The recipe's a secret, of course, but Jamie Oliver has a version here. Alternatively, you can mail order it here. The best thing, of course, would be to visit and eat it fresh.


Wildflowers in Wordsworth's House, Dove Cottage.

The Grasmere Gingerbread Shop
Church Cottage, Grasmere, Ambleside
Cumbria LA22 9SW UK

Tel: 015394 35428
www.grasmeregingerbread.co.uk

June 28, 2009

basil pesto


This is the recipe I use for basil pesto. Because pesto is simple to make, the smallest changes make a big difference. I use very little garlic - half a clove at the most, often less - because I find the taste overpowering when it's raw. The best thing is the addition of butter, which I stole from Maxine Clark's Trattoria. The pesto is a little richer and creamier, and melts with more enthusiasm over hot things. The amount of basil leaves depends, for me, on how peppery and strong they are. I prefer young, small leaves, and I'll use more of them.

My apologies for the lack of posts recently; I was distracted by the sun and Scotland (not necessarily in the same place at the same time).


Basil Pesto
adapted from Maxine Clark, Trattoria

1/2 garlic clove (or even less), peeled and diced
55g pine nuts
approx 55g fresh basil leaves without stalks
150ml good olive oil, plus extra for sealing
35g unsalted butter, softened
4 tbsp freshly grated Parmesan
sea salt & freshly ground black pepper

Place a small pan over medium heat and add the pine nuts. Toast them, dry, for a few minutes, until they begin to smell nutty; be careful not to burn them. Remove from the heat.

If you're using a food processor, you can throw everything in at once and blend until the pesto is as smooth as you like. If you prefer a chunkier pesto, use the pulse setting. I use a blender, and find it easiest to add the garlic, pine nuts, salt and pepper, and a little oil to begin with. I then add the basil and more oil in gradual stages, until creamy and thick, and finally pulse in the butter and cheese.

Pesto will keep in the fridge in a jar, sealed with a layer of olive oil on top to exclude the air. Every time you spoon some out, re-seal with oil.

June 11, 2009

onion & mustard gravy for sausages


A suitably British meal for my first few days in England: bangers and mash with a gravy of caramelised onions, wholegrain mustard and Worcestershire sauce. Only my mash is really crushed and lightly buttered Jersey Royals, the princelings of English new potatoes, with skins so tender the machines used to harvest them are first tested on eggs. My sausages are local too: peppery pork Cumberlands, made in this area for centuries (although usually in long coils) and more highly spiced than other English sausages.

And all this local goodness is not because I set out deliberately to be gourmet or virtuous, but because these good ingredients were what was available at my local supermarket. This supermarket filled me with dismay initially, because it's the kind of tiny place in a tiny town that's designed for tourists and therefore heavy on alcohol and light on fresh produce. This will be a challenge during the summer, when I'm dreaming of bok choi and saffron, but when the available potatoes are Jersey Royals (only in season for a few more weeks) and the home-brand mustard is this grainy and good, I think I'll manage to make do.

The onion gravy is tart and full-bodied without being heavy. It uses white wine, rather than red, and next time I'm going to try using a pale ale. Don't be tempted to use a smooth mustard, because you really need the subtle punch of the whole grains. Most importantly, it's incredibly easy to make. The onions need to be cooked long and slow, and then everything else simmers away while the potatoes and sausages cook. We licked our plates clean of this gravy; it's that good.

Onion & Mustard Gravy for Sausages
serves 4 (but it's so delicious you might want it to serve 2)

2 large or 3 smaller onions, sliced thinly into rings
50g butter (just under 1/2 stick)
300ml chicken stock
100ml white wine
2 tsp wholegrain mustard
1 tsp Worcestershire sauce
pepper & salt, if needed

Melt the butter in a medium saucepan over low heat. Add onions and cook, stirring occasionally, until soft, from 1/2 to 1 hour (the longer the better). Try to keep them from colouring. About 15 minutes before you're ready to eat, turn up the heat to medium high and, when the pan is hot, add the wine. Allow it to sizzle and reduce in volume for 5 minutes, then add the stock, mustard, and Worcestershire sauce. Bring to a low boil and then reduce heat and simmer for 10 minutes. Taste for seasoning - you probably won't need to add salt. Serve hot.

*

To prepare crushed Jersey Royals: don't peel them, but do scrub them gently to remove any flaking skin. Halve larger potatoes, keep smaller ones intact. Cook in already boiling water for 10-15 minutes, testing with the point of a knife to check for tenderness inside the largest pieces. Drain. Crush lightly with a fork, then return to the hot pan with a knob of butter and some salt and pepper. Mix gently until the butter is melted, then serve.

*

To grill (broil) sausages: I love sausages baked and fried (and of course barbecued), but grilling is healthier and fast and can be just as delicious. I prick the sausages lightly once or twice and par-boil them for 5-10 minutes, then remove them from the water and prick them again on both sides. I sit them on a tray in the grill (broiler) pan and let the fat run underneath, where it's caught in aluminium foil and easy to clean up. The par-boiling keeps the interior plump and juicy and means you need only grill long enough at a medium heat to brown but not shrivel the skin, about 10 minutes.

June 10, 2009

white chocolate & pecan blondies


The last thing I cooked in my New Hampshire kitchen before leaving it forever: Nigella Lawson's white chocolate blondies. She uses macadamia nuts, but I used pecans because that's what I had left in my cupboard. There's more to recommend the pecans than my moving-house expediency, however. I like both nut combinations; the pecans, softer than macadamias and a little sweet, complement the fudgy white chocolate really well.

I'm in England now, spending the summer in the Lake District, with strawberries growing in my garden and food to plan for hikes and picnics and road trips to Scotland, among other adventures. Oh, these hills! This place is almost ludicrously lovely.


White Chocolate & Pecan Blondies

adapted from Nigella Lawson, How to be a Domestic Goddess

125 g unsalted butter (this will be just over 1 stick)
250g white chocolate, cut into chunks, or small chips
4 large eggs
1 tsp salt
350g caster/superfine sugar (ordinary granulated sugar will also still work)
2 tsp vanilla extract
300g plain (all-purpose) flour
250g pecans, roughly chopped

25 x 20 x 5cm brownie tin, buttered

Preheat the oven to 340°F / 170°C / gas mark 3. Melt the butter and chocolate either in a microwave or a double boiler. In a large bowl, beat the eggs with the salt until light and beginning to whoosh up in volume, then add the sugar and the vanilla, and continue beating until really creamy and thick. Beat in the slightly cooled chocolate mixture and then add the flour and nuts, folding in gently. Pour into your prepared tin and cook for 35 minutes or until set on top and gooey in the middle. Leave for 3-5 minutes before cutting into small squares.

May 30, 2009

penne with pancetta & rosemary


Lately, in the warmer weather, I've been enjoying pasta toppings that aren't swamped by a thick sauce. Pancetta in the form I've used it for this dish - very thinly shaved - will be sweet and surprising, but easily overpowered if the sauce were any thicker. The onions and tomatoes are sweet too, and through it all comes the strong flavour of rosemary. Use plenty of rosemary, some whole leaves and some snipped. It'll taste like summer.

Penne with Pancetta & Rosemary

3oz / 85g very thinly sliced pancetta (about 15 slices)
1 onion, diced
1 clove garlic, diced
a good handful of fresh rosemary leaves
1 tsp dried red pepper / chilli flakes (or more, or less, to taste)
1 tin peeled whole Italian plum tomatoes*
salt & freshly ground black pepper

penne or other pasta, enough for 2 (main course) or 4 (first course)

Put a frying pan over medium high heat and add pancetta. You can cut the pancetta into smaller pieces with a knife or kitchen scissors; I pull it apart roughly with my hands, so the pieces are still quite large. Cook for approximately 10 minutes, until it's started to curl but isn't yet crispy, then remove from the pan and drain on paper towel.

There should be just enough fat in the frying pan to cook the onions; if there isn't, add a splash of olive oil. Reduce the heat to medium, add the diced onion, and cook until soft, about 15 minutes. Add the rosemary, red pepper (chilli) flakes and garlic, and cook for a further 3-5 minutes, making sure the garlic doesn't colour and stick.

Drain the tomatoes of their canned juice, retaining the juice. Slice off the core of each tomato and squeeze out the seeds (don't keep the seeds). Roughly chop.

Turn the heat under the frying pan up to medium high, and add the tomatoes, the pancetta (I crumble it a little more, and remove some of the fat), and half the juice from the tomato can. Season with a little salt and pepper. Cook, simmering, for about 20 minutes, or until there is very little visible juice.

Meanwhile, cook the penne in plenty of salted, rapidly boiling water until al dente. Drain, then add to the frying pan. Stir through the sauce and cook for a minute or so. Serve immediately with plenty of grated parmesan.

* Later in the summer, when the tomatoes are at their peak, I'll make this with fresh tomatoes, peeled and seeded.