skip to main |
skip to sidebar
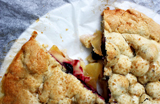
 I'll be honest right away and say that I don't know exactly what a cobbler is (or a grunt, or a slump, or a buckle - but they all sound amazing). I know it has something to do with fruit and something to do with a biscuit/scone dough that co-exists with the fruit. In America, it seems, the fruit sits on top of the dough, which then puffs up around it during cooking to form a solid mass of cakey, cobbler-y goodness. In England, apparently, a cobbler involves a dough that sits on top of the ingredients (which are often savoury); this dough isn't left as one mass, but is cut out into separate shapes. And that's the kind of cobbler I've made, and eaten with great satisfaction: a gooey, aromatic, dark pink soup of softened apples and blackberries, topped by cinnamon-spiked scones, which in turn are sprinkled with demerara sugar.
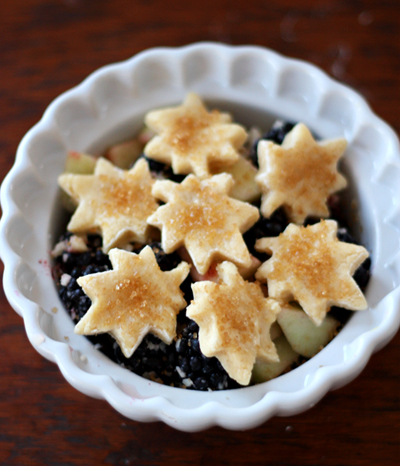 This recipe was enough for me to make four individual cobblers. Officially the dough should be shaped into rounds and overlapped over the fruit, but I liked shaping mine into leaves. Something fantastic happened to the scone-leaves during cooking: they puffed up and became crunchy with the sugar on top, but almost melted into the fruit underneath.
 Blackberry & Apple Cobbler
Adapted from here
Serves 4
For the fruit filling:
700g cooking apples, peeled, cored, and thinly sliced
25g butter, melted
4 tbsp caster/superfine sugar
1 tbsp lemon juice
225g blackberries
For the cobbler topping:
225g self raising flour (or 225g plain flour plus 2.5 tbsp baking powder)
1/8 tsp ground cinnamon
a pinch of salt
100g cold butter, diced
50g caster/superfine sugar
5 tbsp semi-skimmed milk
1 egg, lightly beaten
1 tbsp demerara or turbinado sugar, for sprinkling
Preheat the oven to 200°C / 400°F. Put the apple slices and blackberries in a bowl and drizzle over the melted butter. Sprinkle with the sugar and lemon juice, then mix together to coat the fruit. Pour the fruit into a well-buttered, deep ovenproof dish (about 1.5 litre capacity).
To make the cobbler topping, sift the flour, cinnamon and salt into a mixing bowl. Add the butter and rub in using your fingertips until the mixture resembles fine breadcrumbs (this could also be done using the pastry blade on a food processor). Stir in the caster sugar.
Reserve 1 tbsp of the milk, then mix the rest with the egg and add to the dry ingredients. Stir together with a round bladed knife or fork to make a soft dough. Stop stirring as soon as the dough comes together, then lightly knead on a floured surface for a few seconds until smooth.
Roll out the dough to 1cm thick (just under half an inch) and cut into about twelve 4cm (2.5 inch) rounds (or use a cookie cutter to shape them, as I did). Arrange the scones, overlapping as necessary, on top of the fruit, brush with the reserved milk and sprinkle with the demerara or turbinado sugar. Bake in the oven for 10 minutes.
Reduce the oven temperature to 180°C / 350°F and continue to bake for another 20 minutes or until the scones are cooked and golden brown and the fruit is tender. Serve hot or warm.
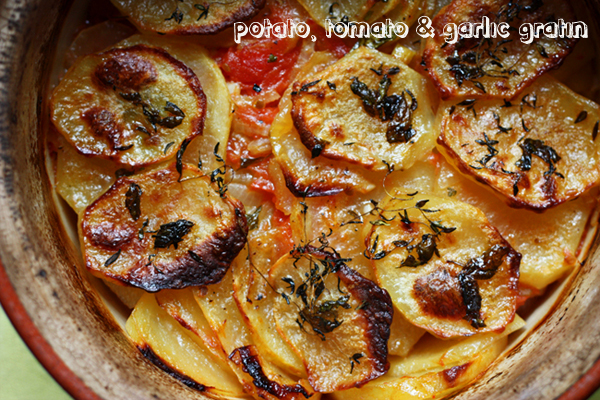
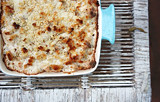
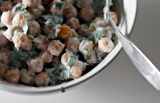
This potato gratin will make your kitchen smell like France. The recipe is from Patricia Wells's introduction to the cooking of French chef Joel Robuchon, Simply French. It's a fabulous and chunky book full of thoroughly home-cookable recipes with a little something extra - they might require a little more precision, a few more steps, a little more effort, and as a reward, they produce really wonderful food. This gratin, for example, tastes as elegant as saucy potato can: thinly sliced and soaked in chicken stock, smothered in a sweet onion and tomato sauce, garlic-studded, and topped with fresh herbs. It was everything my Sunday needed.
The gratin could easily become vegetarian with the use of vegetable rather than chicken stock; grease the pan with olive oil, and toss the top potatoes in olive oil and parsley instead of butter, and it could make a delicious vegan main.
And by the way, what is it about potato dishes that means photographs of them are so likely to look like they belong in a 1970s cookbook?
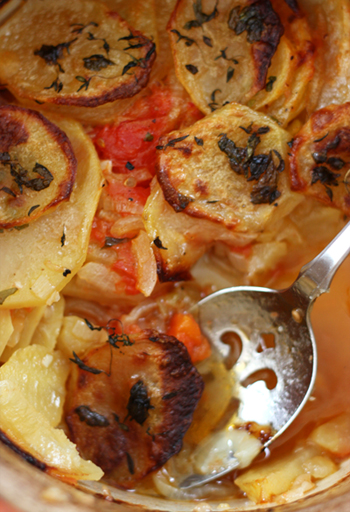
Potato, Tomato & Garlic Gratin
From Patricia Wells & Joel Robuchon, Simply French
Serves 6-8
For the onion & tomato sauce:
4 tbsp extra virgin olive oil
2 medium onions, halved and thinly sliced
sea salt & freshly ground pepper
3 garlic cloves, minced
5 medium tomatoes, cored, peeled, seeded & chopped*
1 tbsp sugar
3 lbs baking potatoes
1 garlic clove, halved
2 tbsp unsalted butter, melted
1.5 cups chicken stock
1/2 cup fresh flat-leaf parsley leaves, snipped
2 tsp fresh thyme
Preheat the oven to 425°F / 220°C. Prepare the sauce: In a large skillet, heat 2 tbsp oil over a high heat. When hot, reduce the heat to moderate and add the onions. Cook until soft and translucent, about 5 minutes. Season and set aside.
In another large skillet, heat the remaining 2 tbsp oil over moderately high heat. When hot, add the garlic and cook until just tender, 1 or 2 minutes. Be careful not to let the garlic burn, or it will taste bitter in the final dish. Add the tomatoes and cook until the mixture thickens, about 10 minutes. Add the sugar, and season.
Combine the onions and tomatoes, and continue cooking to thicken, about 10 minutes more. Taste for seasoning.
Meanwhile, prepare the potatoes: peel, wash, and cut the potatoes into very thin slices. Wash again and dry thoroughly. In a small bowl, set aside about one quarter of the potatoes, which will be used as the topping.
Rub the bottom of an oval baking dish (about 9 x 13 inches) with the garlic and 1 tbsp of the butter.
In a large bowl, combine the remaining potatoes with the sauce and toss carefully to blend. Transfer the mixture to a baking dish, smoothing it out with the back of a spoon. Add enough chicken stock to cover.
In a medium-size bowl, combine the reserved topping potatoes, the remaining 1 tbsp butter, and the parsley. Toss to coat evenly. Beginning at one end of the dish, place the buttered potatoes, one by one, in slightly overlapping rows on top of the tomato-covered potatoes, until the entire dish is covered with an even potato layer. Sprinkle with the thyme.
Place the dish in the centre of the oven and bake until the potatoes are soft, most of the liquid has been absorbed, and the top is golden, about 1.5 hours. Serve immediately.
* How I peel tomatoes: bring a saucepan of water to a rolling boil. Prepare a bowl of cold water large enough to hold all the tomatoes. Cut a slit in the skin of each tomato from top to bottom, and drop them all into the boiling water. Leave them in the boiling water for approximately 1 minute before removing each tomato with a slotted spoon and placing it immediately in the bowl of cold water. As soon as the tomato is cool enough to touch, remove the skin, which will now slide away easily.
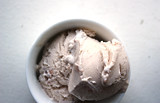
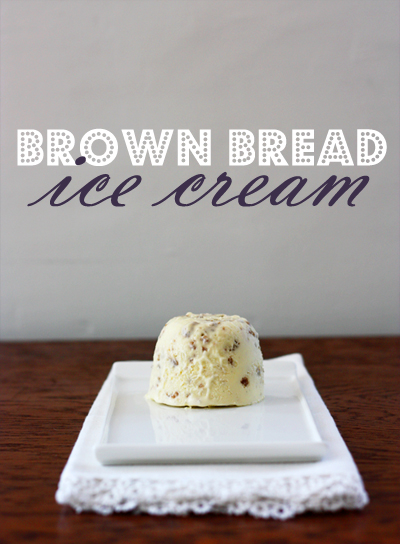 I first ate brown bread ice cream in Cambridge, England, in the dining hall of a college famous for its ice cream varieties. Brown bread isn't the most auspicious of flavourings, not in a world that includes chocolate and fig and pistachio, but somehow, once caramelised with sugar and mixed in with cream and vanilla and egg, it becomes almost toffee-like, and incredibly good.
  The history of brown bread ice cream is a little confused: both Ireland and England claim it as their own. Either way, people started eating it in the nineteenth century. It's mentioned in Cassell's New Universal Cookery Book, published in England in 1894 (that version includes brandy, which sounds like a good idea to me).
This recipe doesn't use an ice cream maker, but the result is still smooth and creamy - the very best texture I've seen from a non-machine made ice cream. It's almost more like a frozen custard.
 Brown Bread Ice Cream
from Epicurious
1 cup crumbs from brown soda bread or crustless whole wheat bread, preferably a little stale
8 tbsp sugar
3 tbsp (packed) dark brown sugar
2/3 cup whole milk
1 3-inch piece vanilla bean, split lengthwise
2 large egg yolks
1 1/3 cups chilled whipping cream
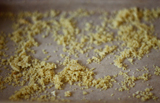
Preheat oven to 375°F / 190°C. Line baking sheet with foil; butter foil. Mix breadcrumbs, 3 tbsp sugar and all the brown sugar in a medium bowl. Scatter over prepared baking sheet. Bake until sugar begins to melt and crumbs are slightly darker, stirring crumbs occasionally with metal spatula to prevent sticking, about 10 minutes. Transfer breadcrumbs to a bowl and cool. Break crumbs into small pieces.
Place milk in medium saucepan. Scrape in seeds from vanilla bean; add bean. Bring to simmer. Remove from heat and let steep 30 minutes.
Whisk egg yolks and 5 tbsp sugar in a large bowl to blend. Gradually whisk in milk mixture. Return mixture to same saucepan. Stir over low heat until custard thickens and leaves path on back of spoon when finger is drawn across, about 5 minutes (do not boil). Strain into small bowl. Chill custard until cold, stirring occasionally, 1 hour.
Beat whipping cream in large bowl until firm peaks form. Fold custard into cream. Gently fold into breadcrumbs. Transfer to covered containers and freeze. Can be prepared 3 days ahead. Keep frozen.
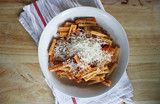
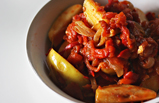
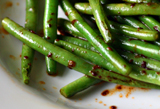
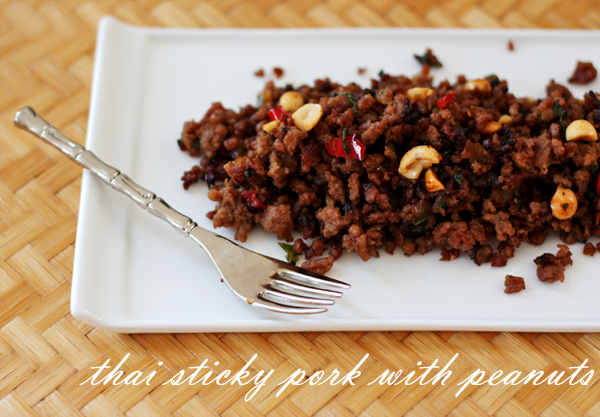 The longer days, the sunshine, and the heating still gently on inside make things feel much more like summer, and so I want to eat summery food. Summer means home (Australia) for me, and home means going out for South East Asian food. That's harder to do in small-town New Hampshire. So, for tonight's dinner I made something spicy, nutty, juicy and full of summery flavour: Thai-style sticky pork with peanuts.The dish uses two special ingredients: kaffir lime leaves and palm sugar. The lime leaves I used were dried and came from Tesco in the UK - just over 1 pound for a small tube of aromatic, brilliantly coloured leaves. The smell of these leaves is incredible: they really do just smell like green curry. Palm sugar is unrefined and comes from the sap of wine palms, and has a fantastic depth of flavour. I bought mine at Asia Market at 71 1/2 (yes, really!) Mulberry St in Chinatown, New York. Palm sugar usually comes in solid blocks, which is why the recipe calls for it to be grated. If you can't find palm sugar, don't substitute white sugar - use brown sugar instead. You need that almost-burnt flavour in this dish. You might even consider throwing in a little maple syrup - eaten raw, palm sugar reminds me of those New England / Canadian maple syrup candies.
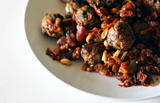
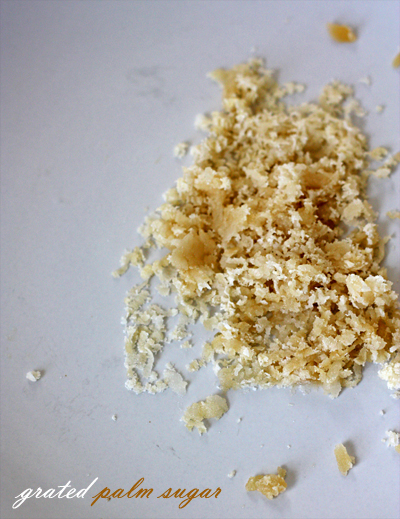 Serve with jasmine rice and some steamed greens like boy choi; or I can imagine this being delicious wrapped up in rice paper rolls with soft lettuce, vermicelli noodles and some more peanuts; or very simply served in lettuce cups.
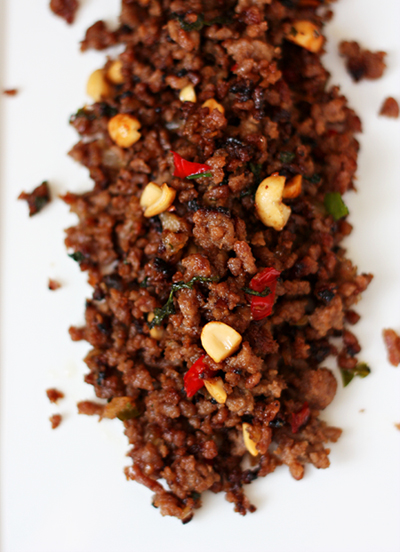 Thai Sticky Pork with Peanuts
Serves 2-3
1 tbsp peanut (groundnut) oil
300g (just over 1/2lb) minced/ground pork
2 cloves garlic, sliced thinly
1/2 cup (80g) grated palm sugar
2 tbsp fish sauce
4 kaffir lime leaves, shredded
1/2 cup (50g) deep-fried shallots/green onions/scallions*
1/2 cup (75g) chopped unsalted peanuts
1 1/4 cups lightly packed coriander/cilantro leaves
1 tbsp lime juice
1 long red chilli, seeded, sliced thinly
Heat the oil in a large frying pan or wok. Add the pork. Cook, stirring, for about 5 minutes or until browned lightly. Add the garlic and cook, stirring for about 1 minute, making sure it doesn't burn. Drain on absorbent paper and discard excess fat.
Add sugar, sauce and lime leaves to the pan. Bring to a boil, then reduce heat and simmer, uncovered, for about 2 minutes or until thick. Return the pork to the pan with half the shallots and half the peanuts. Cook until the mixture is sticky but not too dry, 5-10 minutes. At this point, try not to move the meat around too much - you want it to caramelise in the sugary sauce.
Stir 1 cup of the coriander/cilantro leaves in with the lime juice, the chilli and the remaining shallots/scallions and peanuts. Top with the remaining coriander to serve.
* I didn't have any scallions, so just finely diced half an onion and cooked it separately with a little peanut oil, then added it all at the stage the recipe asks for half of the shallots/scallions.
* Original recipe from Australian Women's Weekly.
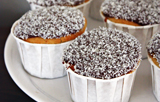
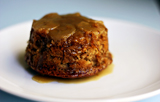
 There's something so cosy and satisfying about the word 'dumplings'. I didn't grow up eating any kind of dumpling - is that because Australia's climate isn't particularly dumpling-appropriate? - but living in England, and now in America, I'm slowly making up for it. These golden syrup dumplings are so English, so neo-Victorian, and so sticky and messy and sweet. They seem like nursery treats to me - the kind of thing Mary Poppins might have served to her charges.
If dumplings (except the Chinese kind stuffed with pork and prawns and mushrooms and served on yum cha trolleys) aren't common in Australia, golden syrup is. Golden syrup is a partially inverted cane sugar syrup. It's not molasses and it's not treacle; it's lighter, less bitter than molasses, and although some recipes suggest light corn syrup as a substitute, it has a much more complex flavour. In my childhood, my mother cooked it into ginger cookies and sticky puddings. I could eat (and have eaten) it by the spoonful. I've always thought it has a very slightly metallic taste along with all that fudgy caramel.
Lyle's is the queen of golden syrups. In England it comes in squat round tins with lids you must prise off with a teaspoon. The company logo depicts bees hovering over a supine lion. I always wondered: is the lion dead? Or just sleeping? Or just hanging out with the bees? The company motto is "Out of the strong came forth sweetness" (a line from an Old Testament story in which Samson kills a lion and then finds a honeycomb in it - so yes, the lion is dead). All of it is like some couplet from William Blake. You can buy plastic bottles of Lyle's golden syrup in some American supermarkets; I always bring some tins back with me from the UK.
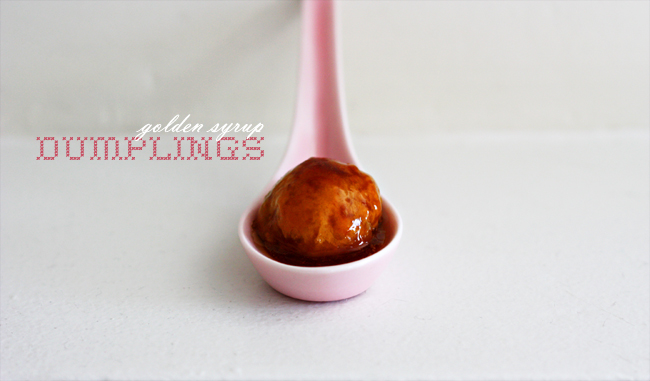
The idea of golden syrup dumplings was irresistible to me. Although dumplings suggest cosy wintering, this feels like a warmer weather recipe - a cool spring, or the end of summer - when fluffy cake, gooey sauce and a drizzle of cream are all appealing things. I've made them just bite-sized enough so they're not overwhelming. As it is you won't need more than 3 or 4 per person. I added lemon juice to the original sauce recipe to cut the sweetness. You really need to serve these immediately, or to keep the sauce warm - it solidifies and becomes chewy very quickly. For the same reason, they won't really work with ice cream.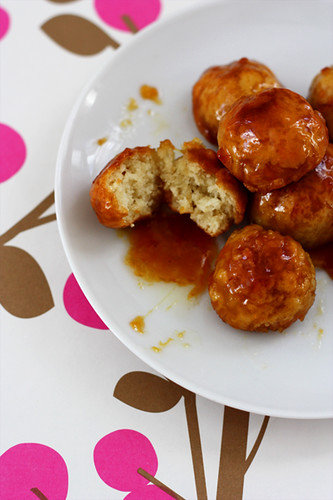 Golden Syrup Dumplings
Adapted from Australian House & Garden
For the dumplings:
3/4 cup plus one tablespoon self-raising flour (or all-purpose flour, plus just under 1 1/2 tsp baking powder)
pinch salt
20g butter
1 egg, beaten
2 1/2 tbsp (50 ml) milk
For the sauce:
1 cup golden syrup
1/2 cup water
60g butter
2 tsp freshly squeezed lemon juice
runny cream, to serve
To make the dumplings, sift flour and salt into a bowl. Rub in butter, then add egg and stir to combine. Gradually stir in milk until the dough resembles scone mix: firm but pliable. Set aside.
To make the sauce, combine golden syrup, water and butter in a large frypan with a fitted lid. Bring to the boil, then reduce to a simmer.
Meanwhile, flour your hands and roll dumpling dough into balls: for smaller, tighter dumplings, roll about 1 tsp of dough to a ball the size of a marble, as shown in my photographs; for large, softer dumplings, double this size.
Cover with baking paper a dish large enough to hold all the dough balls. Place the balls on it, then slip them off the paper all together into the syrup. Make sure the balls aren't touching each other, as they'll double in size during cooking. Cover and cook for 10 minutes, then turn over to cook on the other side for another 10 minutes. Remove with a slotted spoon and serve with the sauce and a jug of runny cream.
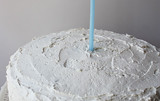
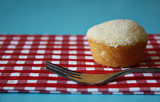
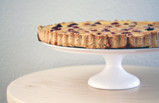
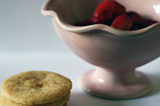
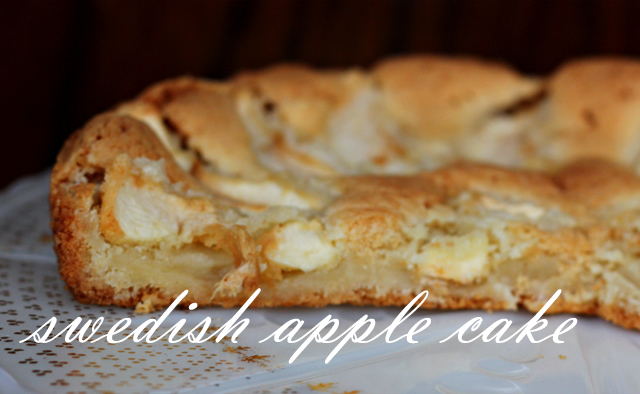 This is my favourite cake. It's in no way gorgeous: just simple eggs, butter, sugar, flour, topped with chunks of apple, and baked slowly until it's chewy and tender. The Scandinavian tradition of the "visiting cake" that can be thrown together in 10 minutes and ready to eat in 50 is so appealing to me. I wish my cooking was always as effortless. It's welcoming without being overwhelming, and it's this kind of gentle generosity that delights the weary traveller.
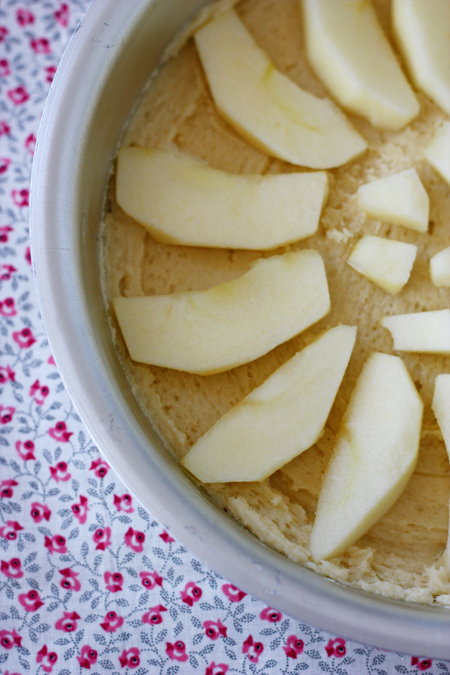 The recipe is from the wonderful Dorie Greenspan, whose work I was unfamiliar with until I moved to America. I wish I'd known her books years earlier, but I also wouldn't sacrifice the delight of finding her on a library shelf far from home. This one is from her column on Serious Eats, Baking with Dorie. The recipe calls for a skillet; I use my tarte tatin pan with great results. I recommend buttering the pan and laying baking paper.
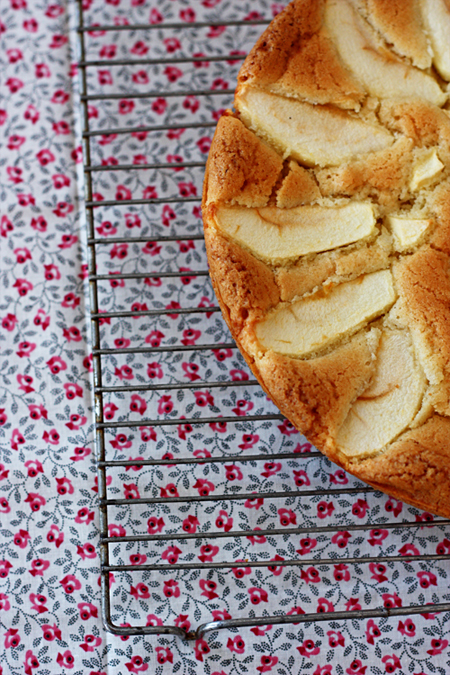 Another reason to love this cake: it keeps really well. Wrapped in plastic at room temperature, it transforms from crisp and chewy to a soft cookie of sweet apple. I make it whenever I have friends coming to stay, and for myself to take on buses and planes.
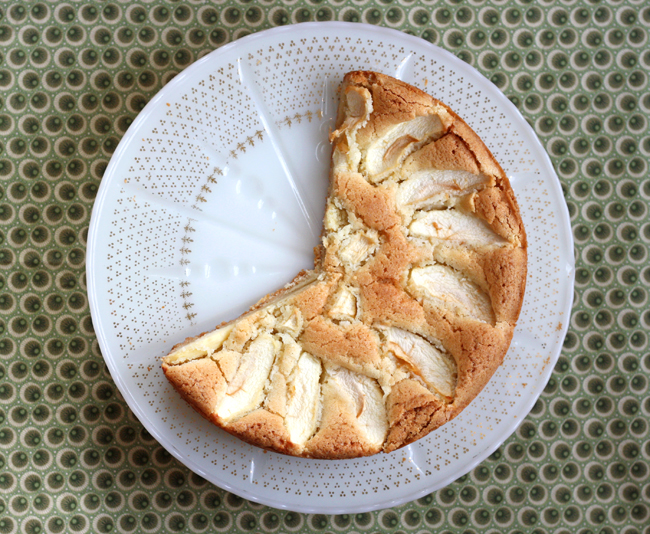 Swedish Apple Cake
from Dorie Greenspan on Serious Eats
3/4 cup all-purpose/plain flour
1 tsp baking powder
pinch of salt (optional)
1 extra large egg or 1 large egg plus 1 large egg yolk
3/4 cup sugar
1/2 tsp pure vanilla extract (optional)
1 stick (4 oz) unsalted butter, melted and cooled*
1 to 1 1/2 apples (Dorie likes Fujis), peeled, cored, and cut into 1/2-inch thick wedges
apple, quince or jelly preserves, for glazing the cake (optional - I've used fig paste melted in a little hot water, and it was delicious)
Center a rack in the oven and preheat the oven to 350 degrees Fahrenheit / 180 Celsius.
*Melt the butter (this is a step I often forget until suddenly the need for melted and cooled butter is upon me!).
Whisk together the flour, baking powder and salt, if you're using it.
Working in a mixing bowl with the whisk, beat the egg(s) and sugar together until thick and pale. Stir in the vanilla, if you're using it, and then the melted butter. The mixture will be smooth and shiny. Stir in the dry ingredients and scrape the batter into the prepared pan. Top with the apples, making a spiral pattern. Leave some space between each slice, so the batter can puff up between the wedges - it looks much nicer with the puffs.
Slide the pan into the oven and bake for about 40 minutes, or until a knife inserted into the cake comes out clean. Transfer the cake to a cooling rack.
If you want to glaze the cake, warm a few spoonfuls of jelly/jam and a splash of water in a microwave oven (or a saucepan) until the jelly liquefies. Brush the jelly over the hot cake.
Let the cake cool for at least 15 minutes, or wait until it reaches room temperature, before you cut it into wedges to serve.
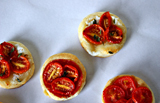
 It's still winter - still very definitely winter, in the frigid part of the world I live in - but I'm ready to stop eating as if it's winter. We had fresh snow last night, but earlier in the week I walked outside without a coat and was so startled to hear birds that I thought, for a moment, a poltergeist had hit play on my stereo. So in that brief respite I made myself a spring-like lunch: this caramelised onion and tomato tart.
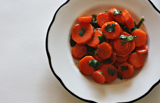
The inspiration for this tart is Claudia Roden's Alsatian onion tart in The Book of Jewish Food (US, UK). That tart, tomato-less and heavier with onions, is one of my favourite things to eat. Onions are robust once caramelised, I know, but the perfect poise of this creamy filling is light and delicate. It also suggests alternatives to its purity: some leeks, some truffle salt, perhaps (every now and then) some bacon. Or, in optimistic honour of the coming warmth, vine-ripened tomatoes and flecks of freshly ground pepper. Perfect for lunch with a fresh green salad.
Caramelised Onion & Tomato Tart
adapted from Claudia Roden's Tarte aux Oignons d'Alsace
For the pastry:
125g unsalted butter
250g plain flour
1/4 tsp salt
1 egg, lightly beaten
1-2 tbsp milk (if required)
For the filling:
1 large onion
25g butter
2 tbsp sunflower or light vegetable oil
salt
2 tbsp plain flour
250 ml light double cream
2 eggs, lightly beaten
white pepper
2 ripe tomatoes
salt & freshly ground black pepper
To make the pastry: cut the butter into small pieces and rub it into the flour and salt with your hands. Add the egg, mix well, and work very briefly with your hand until bound into a soft sough, adding a little milk if necessary. Cover in plastic wrap and refrigerate for 1 hour.
To make the filling: cut the onion in half, then into thick slices. Heat the butter with the oil in a large pan and cook the onion over very low heat and with the lid on for about 1 hour, or until very soft and lightly coloured, stirring occasionally and adding a little salt. Now add the flour and stir well. Beat the cream into the eggs. Let the onions cool a little before sirring into the cream mixture. Taste before adding a tiny bit of salt if necessary and pepper. The tart should not be too salty.
Preheat the oven to 300 Fahrenheit / 150 Celsius / gas oven 2.
Slice the tomatoes 1/2 a centimetre thick, place the slices to drain on a paper towel, and sprinkle with a little salt.
Line a greased 25cm tart pan or rectangular tart mould with the dough by pressing it in with the palms of your hands (easier to do with this soft dough than to roll it out) and pressing it up the sides. Pour in the creamy filling, then top with tomato slices. Bake for 1 hour, or until set and golden. Serve hot or cold, with freshly ground black pepper.