December 22, 2009


I'm spending my holidays back in England's Lake District, where snow is falling, snow on snow, and my days are spent walking in the hills or reading by the fire. I'm a pampered guest, so I'm not really cooking, but I'm feasting on things like Grasmere gingerbread and Cartmel sticky toffee pudding.

Thank you so much for reading O Pistachio this year (I can't believe it's nearly time for the one year anniversary!). And while I think of it, my very first post, early in 2009, was these lovely bread wreaths: they were perfect on our Christmas table.

I hope your holidays are full of peace, joy, and delicious baked goods.

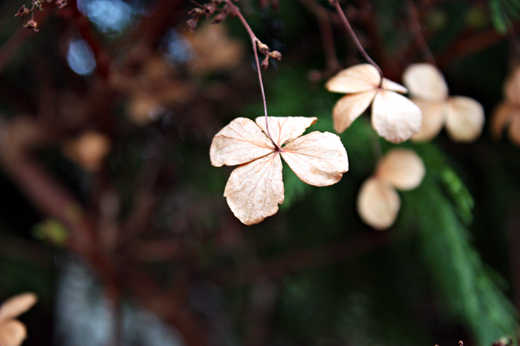
Here are some photos of all the loveliness I'm enjoying.


December 17, 2009

cream cheese frosting


Frosting is a foreign term to me - usually I'd say icing. But when it has cream cheese in it, I feel like it just has to be called frosting. I made this to go with gingerbread cupcakes, but I can imagine it just as happily on carrot cake, or chocolate cake, or basically any other kind of cake. Those cupcakes are delicious enough not to be a mere vehicle for frosting, but you'd want to make sure whatever you paired this stuff with could stand up to its impact. Otherwise you may just find yourself eating it with a spoon (not that there's a damn thing wrong with that).

And the nice thing is that it's the Joy of Cooking recipe. I tried it because of Slashfood, which calls it "the last cream cheese frosting recipe you'll ever need".

Cream Cheese Frosting
From The Joy of Cooking

8 oz cold cream cheese*
5 tbsp softened butter
2 tsp vanilla
2 cups powdered (confectioner's/icing) sugar, sifted after measuring, plus extra to taste

Beat cream cheese, butter and vanilla together with an electric mixer until smooth and combined. Gradually add 2 cups powdered (icing) sugar, and then add more sifted powdered (icing) sugar until it reaches a sweetness you like.

* Cold cream cheese really does make a difference, but it shouldn't be super-hard - just straight out of the fridge.

gingerbread cupcakes with cream cheese frosting


Please make these: they're amazingly good. They're warm with ginger and spice, soft, and they're great as tiny little cakes, which is how I made them. The cream cheese frosting is so phenomenal that I'm going to give it its own post, just so I can find it easily in the future. I took them to a party and let people ice their own cakes; the kids liked them plain, the grown-ups were all over the frosting. One of my friends took the leftover frosting home and "ate it like a pudding".

The original Martha Stewart recipe uses unsulphured molasses, which I don't love; I substituted golden syrup
, which still gives a fantastically gingerbready flavour. I know golden syrup is less common in the US, but I've found it for sale in both the groceries stores near me in Austin
.


Gingerbread Cupcakes
adapted from Martha Stewart

2 tsp baking soda (bicarbonate of soda)
2 1/2 cups all purpose (plain) flour
2 tsp ground ginger
1 1/2 tsp ground cinnamon
1/2 tsp ground cloves
1/2 tsp ground nutmeg
1/2 tsp salt
2 tsp baking powder
8 tbsp (1 stick) unsalted butter, room temperature
2/3 cup packed dark brown sugar
1 cup golden syrup
2 large eggs, room temperature, lightly beaten

Heat oven to 350°F / 175°C. Line muffin tins (mini or otherwise) with paper baking cups, and set aside. In a small saucepan, bring 1 cup water to a boil. In a bowl, combine boiling water and baking soda; set aside. In a large bowl, sift together flour, ground spices, salt, and baking powder; set aside.


In an electric mixer fitted with the paddle attachment, cream the butter until light. Beat in the brown sugar until fluffy, 1 to 2 minutes. Beat in the golden syrup, baking-soda mixture, and flour mixture. Beat in the eggs.


Fill the cupcake papers three-quarters full. Bake cupcakes until a toothpick inserted in the center of them comes out clean, about 25 minutes for ordinarily-sized cupcakes, or 15-20 minutes for mini cupcakes. Let cupcakes cool a few minutes, then transfer to a wire rack to cool completely before decorating.


December 11, 2009

maple pot de creme


Maple syrup is one of those flavours that is miraculous with everything. Truly - everything. I'm grateful to America for a lot of things (some of my dearest friends, for example), but maple syrup with bacon is very high on the list. I'd never combined these two delicious things until I moved to the US. You might say my life hadn't really begun, and if you were to say that, I might protest only slightly. Part of me would know that was true.

I'd also never eaten pot de cr
ème until my Oregonian friend Michael forced me to (when I say forced, I mean that he very kindly made coffee pot de crème for dessert one frigid New England night, for which I am still grateful). Michael is a poet and a chef, two excellent things to combine (much like maple syrup and bacon).

Pot de cr
ème is really just chilled and flavoured custard. It's full of good, nutritious things, like eggs and cream and milk, and then flavoured with something - often with vanilla, which is probably its most chic incarnation. Because it's the season for it, I chose maple syrup. I served mine with lightly toasted walnuts and blackberries.

I wish I had a photo of how smooth and silky the custard was under that honey-coloured layer. I meant to keep one aside, not only to photograph the next day, but to enjoy. But we ate it. I knew it was wrong, but I was powerless to prevent us.
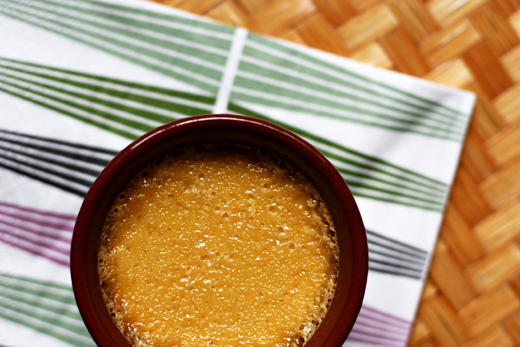


Maple Pots de Creme
recipe from Eggs on Sunday

1 1/2 cups heavy cream

1/2 cup maple syrup (Grade B/Dark Amber for best flavour)

1/4 teaspoon salt

4 egg yolks

1/2 teaspoon vanilla

Preheat the oven to 300°F / 150°C. Place four 3/4-cup ramekins in a metal baking pan and set aside.

In a medium saucepan, bring the cream, maple syrup, and salt to a simmer over medium high heat. While the cream mixture is heating, whisk together the egg yolks and vanilla in a large bowl.

Once the cream comes to a simmer, temper the egg yolks by slowly adding the hot cream mixture, little by little, into the egg yolk mixture and whisking constantly. Once all the cream mixture has been incorporated, strain it through a fine-mesh sieve either back into the pot that you heated the cream in, or into a glass liquid measuring cup.

Divide the mixture among the four ramekins. You’ll bake them in a hot water bath, so pour enough very hot tap water into the baking dish so that it comes halfway up the sides of the ramekins.

Bake in the oven for about 50-60 minutes, or until the pots de creme are set around the edges but still slightly jiggly in the middle. Once they reach this point, remove them from the oven and take the ramekins out of the hot water bath. Let them cool at room temperature (they will continue to set as they do so.)

Makes 4.

December 8, 2009

apple strudel muffins


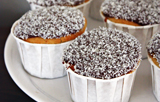
I made these as a bribe: I had to give a presentation in class (on this extraordinary object, which in other circumstances - for example, at a party, with bourbon - I'd be happy to talk about at length), it was far too early in the morning, and I thought it was best to distract my audience with muffins. Now I think they may be the perfect decoy in all kinds of situations. They're a little spicy from the cinnamon and nutmeg, not too sweet, soft with apple, and covered with a crunchy strudel topping.

Aren't these baking cups lovely? I bought them in Singapore, at a wondrous store where everything was Japanese and cost $2. I think about that store much more often than is strictly necessary.


Apple Strudel Muffins
adapted from Allrecipes

2 cups plain (all purpose) flour
1 tsp baking powder
1/2 tsp baking soda (bicarbonate of soda)
1/2 tsp salt
1/2 cup unsalted butter, room temperature
1/2 cup white sugar
1/2 cup light brown sugar
2 eggs
1 1/4 tsp vanilla extract
1 tsp ground cinnamon
1/2 tsp ground nutmeg
1 1/2 cups finely diced apples

For the topping*:
1/3 cup packed brown sugar
1 tbsp plain (all purpose) flour
1/8 tsp ground cinnamon
1 tbsp butter

Preheat oven to 375°F / 190°C. Grease a 12 cup muffin pan or a 24 cup mini muffin pan, or fill with muffin/cupcake cases.

In a medium bowl, mix flour, baking powder, baking soda, salt, nutmeg and cinnamon.

In a large bowl, beat together butter and sugar until smooth. Add eggs. Mix in vanilla. Stir in apples, and gradually blend in the flour mixture. Spoon the mixture into the prepared muffin pan.

To make the topping, mix brown sugar, flour and cinnamon in a small bowl. Melt the butter and stir it through the sugar mixture until it forms coarse crumbs. Sprinkle over tops of muffin mix.

Bake 20 minutes in a preheated oven, or 15 minutes for mini muffins, or until a toothpick inserted in the centre of a muffin comes out clean. Allow to sit for 5 minutes before removing muffins from the pan. Cool on a wire rack.

* Some of the reviews on allrecipes suggest making double the topping mixture. Then, you fill the muffin pans halfway with the muffin mixture, add half the topping, top up the muffin pans with muffin mixture, and then add the rest of the topping. I think this sounds fabulous, but I didn't try it because I was making mini muffins.